Pages

Sunday, December 9, 2012

Headless RCP - with many plugins

Introduction

This is the 3rd blog for making standalone headless RCP. For the other two blogs check the references.

In this blog, we are going to show what is needed for an application that depends on other plugins. For the example, we use JDT and LTK, and show to how to implement a rename refactoring tool.

Procedure

Add source code

PastedGraphic41-2012-12-9-20-15.png

You’ll have a lot of errors when you don’t set up the dependencies correctly.

PastedGraphic42-2012-12-9-20-15.png

Using Quick help, you can add required plugins.

PastedGraphic44-2012-12-9-20-15.png

You see the plugin is added in MANIFEST.

PastedGraphic45-2012-12-9-20-15.png

However, the simplest way is to add the dependences in MANIFEST.MF.

PastedGraphic43-2012-12-9-20-15.png

PastedGraphic48-2012-12-9-20-15.png

Don’t forget to set the singleton flag.

PastedGraphic46-2012-12-9-20-15.png

PastedGraphic47-2012-12-9-20-15.png

Run Configurations

You need to execute run configuration to click the “Add Required Plug-ins” button for both application and product.

PastedGraphic49-2012-12-9-20-15.png

Update the product

Go to the product configuration and update using “Add Required Plug-ins”

PastedGraphic50-2012-12-9-20-15.png

References

Headless RCP - standalone

Introduction

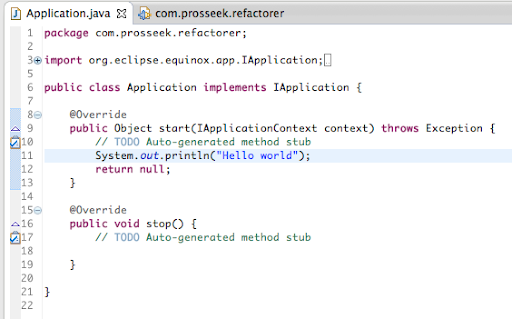
We have another blog on making a headless RCP (Headless RCP - simple). In this article, we make the program into a standalone desktop RCP application.
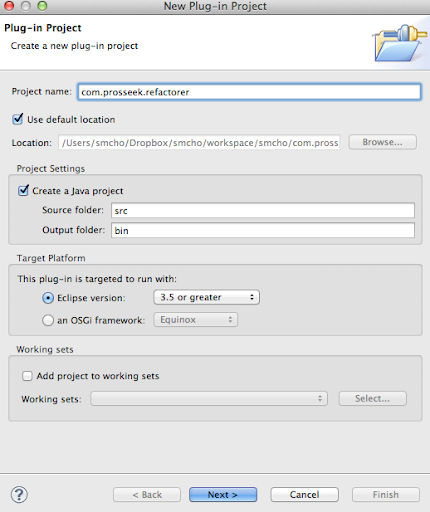
Procedure

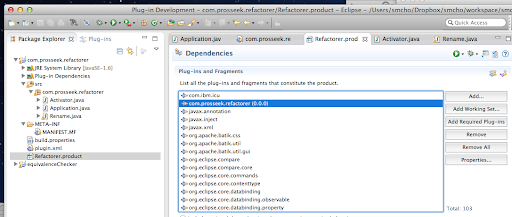
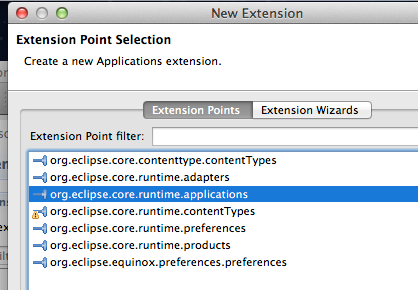
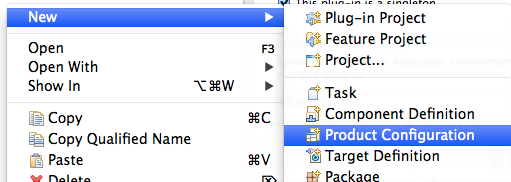
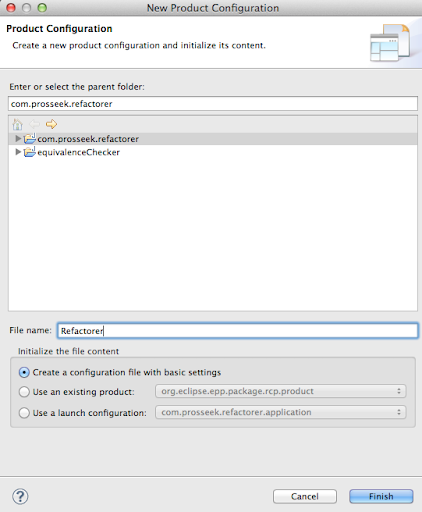
You need to make a “Product Configuration”.

PastedGraphic18-2012-12-9-19-37.png

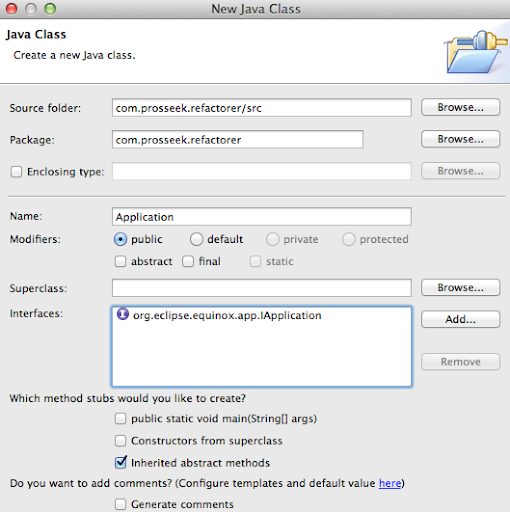
Select the application that we created before.

PastedGraphic20-2012-12-9-19-37.png

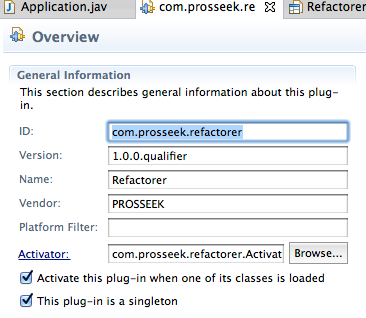
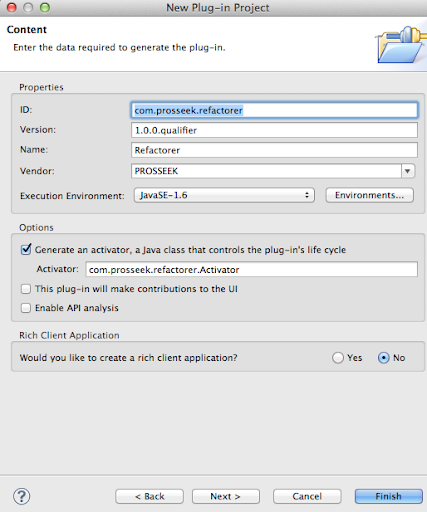
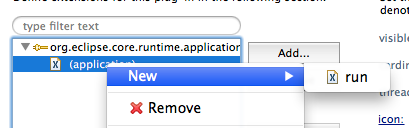
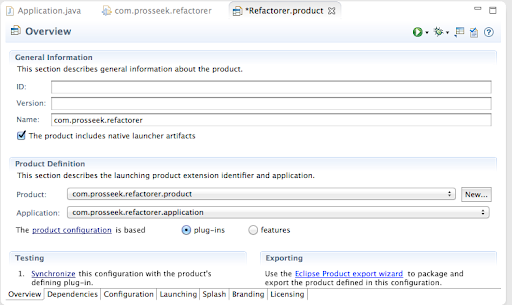
Setting the “Product Definition”.

PastedGraphic21-2012-12-9-19-37.png

Don’t setup anything in ID.

PastedGraphic22-2012-12-9-19-37.png

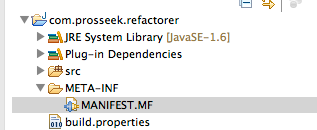
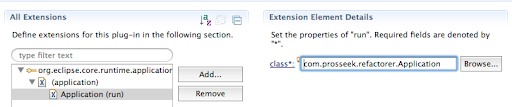
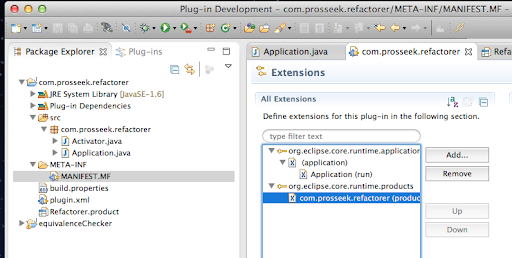
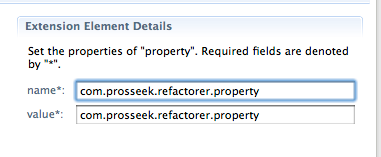
Update the MANIFEST.MF

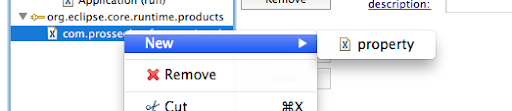
Go to MANIFEST.MF, and you’ll see you already have an extension. Add property.

PastedGraphic23-2012-12-9-19-37.png

PastedGraphic24-2012-12-9-19-37.png

PastedGraphic25-2012-12-9-19-37.png

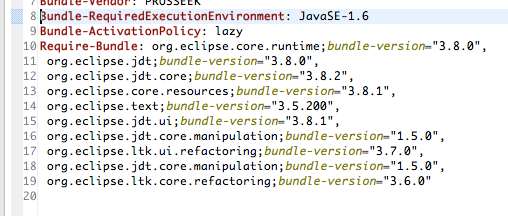
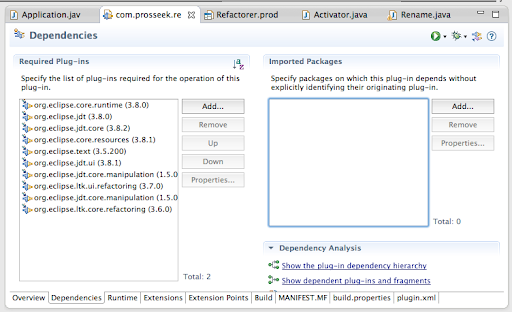
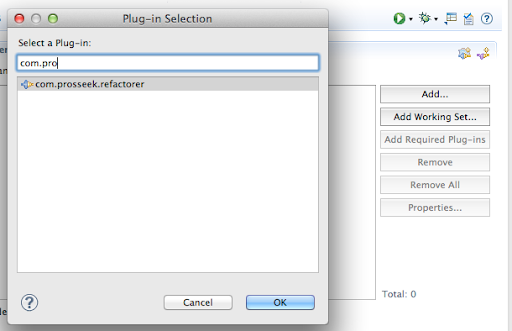
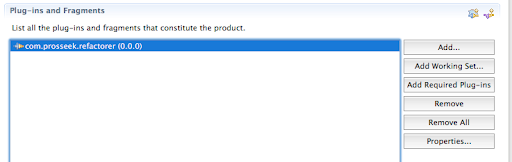
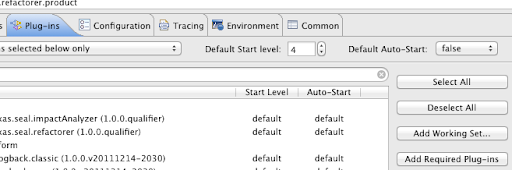
In Dependencies, you have to add the application you just created.

PastedGraphic27-2012-12-9-19-37.png

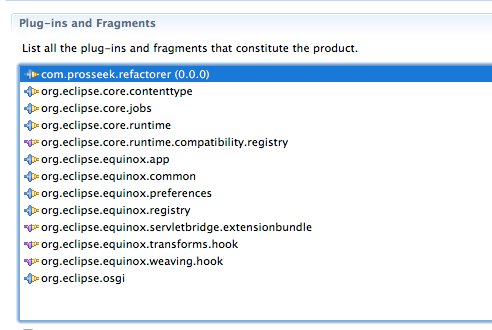
Then click “Add Required Plug-ins”.

PastedGraphic28-2012-12-9-19-37.png

You’ll see all the required plugins are added.

PastedGraphic29-2012-12-9-19-37.png

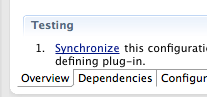
Click synchronize to check everything is OK.

PastedGraphic26-2012-12-9-19-37.png

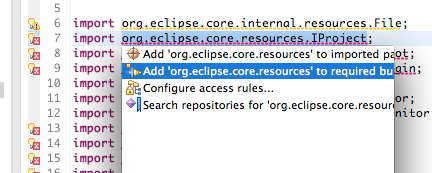
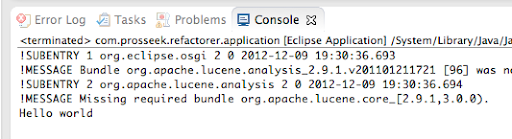
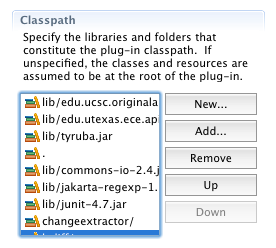
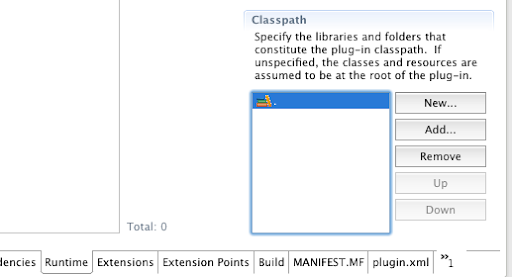
And then, you need to add all “.” and all the namespaces additional to your exported one in the “Runtime/Classpath”. Without this configuration you’ll have errors when you launch the standalone program even when your program works fine within the eclipse IDE.

PastedGraphic2-2012-12-9-19-37.png

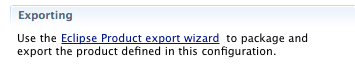
Exporting the headless RCP

PastedGraphic34-2012-12-9-19-37.png

PastedGraphic30-2012-12-9-19-37.png

PastedGraphic31-2012-12-9-19-37.png

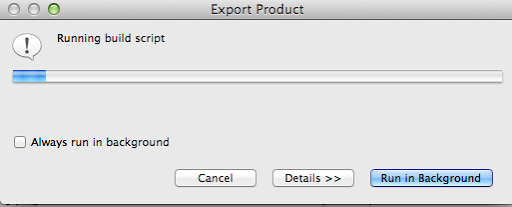
You’ll see that the standalone headless RCP is created in the directory you specified.

PastedGraphic32-2012-12-9-19-37.png

Executing standalone headless RCP

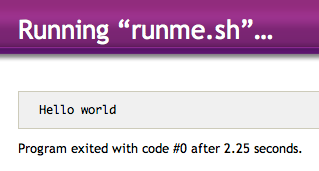
For execution, you can run “/DIRECTORY_TO_THE_RCP/Eclipse.app/Contents/MacOS/eclipse -data WORK_SPACE -clean”. You can make the shell script. Check that it also has the “-clean” parameter.
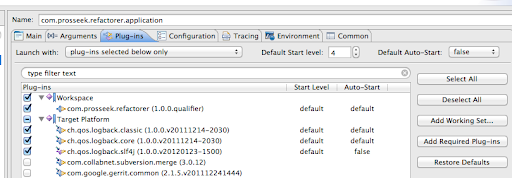
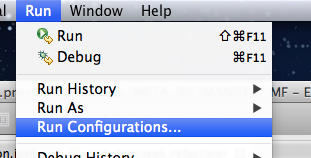
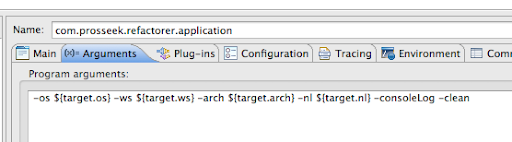
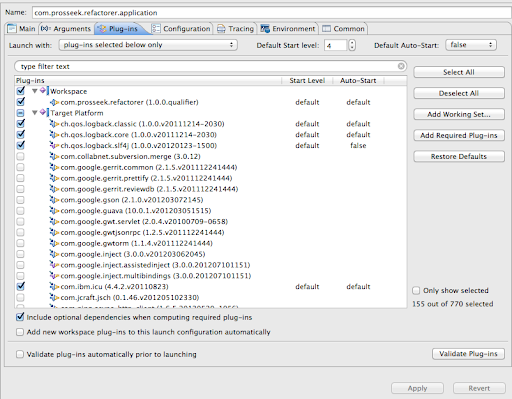
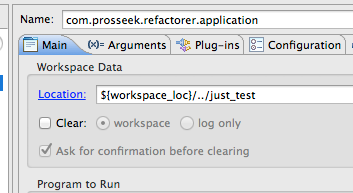
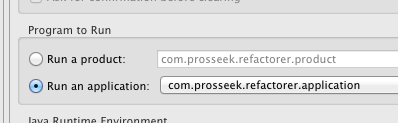
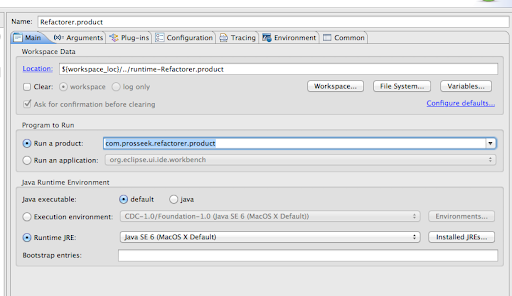
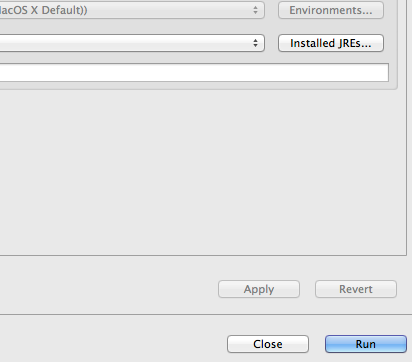
PastedGraphic33-2012-12-9-19-37.png

Run Configuration

You can create a run configuration so that you can launch the product within eclipse IDE.

PastedGraphic35-2012-12-9-19-37.png

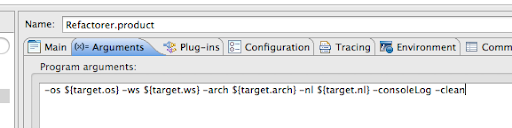
Add -clean parameter.

PastedGraphic36-2012-12-9-19-37.png

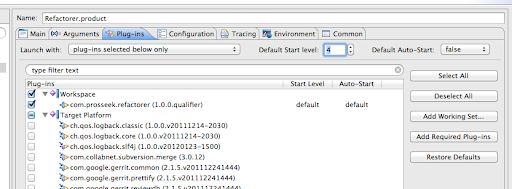
Add “Required Plug-ins”

PastedGraphic37-2012-12-9-19-37.png

You can run to get the same result.

PastedGraphic39-2012-12-9-19-37.png

PastedGraphic38-2012-12-9-19-37.png

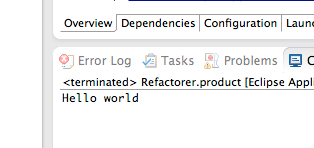
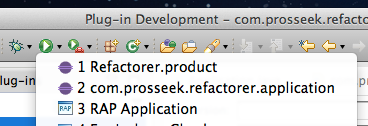
After the first launch, you have the product in the run button.

PastedGraphic40-2012-12-9-19-37.png

Issues and solutions

  • It worked fine, but when you do something more and you suddenly have an error, the first thing you need to check is “Run Configurations”, then “Add Required Plug-ins”, PastedGraphic1-2012-12-9-19-37.png
  • Not found Activator
    • You may have “org.osgi.framework.BundleException: The activator ABC.Activator for bundle ABC.refactorer is invalid” error when you launch the standalone binary. In that case, add “.” in the runtime class path.PastedGraphic-2012-12-9-19-37.png

References

Headless RCP - simple

Introduction

Creating headless RCP for Juno (eclipse 4) seems to be straightforward, but some tricky configuration and setup is required to have a working headless RCP. This article aims to show the procedure for making headless RCP for Juno.

Procedure

Start with Plug-in Project

PastedGraphic-2012-12-9-18-54.png

PastedGraphic1-2012-12-9-18-54.png

Don’t forget to unchkec “This plug-in will make contributions to the UI”.

PastedGraphic2-2012-12-9-18-54.png

No template to use.

PastedGraphic3-2012-12-9-18-54.png

Now, you have the skeleton code.

PastedGraphic4-2012-12-9-18-54.png

Setup MANIFEST.MF

Go to the Extensions tab. You need an “Extension Point” so that you can make an eclipse application.

PastedGraphic6-2012-12-9-18-54.png

Click right button to add “run”.

PastedGraphic7-2012-12-9-18-54.png

Make the class name as “Application”, clicking “class*”, you can open the Java source.

PastedGraphic8-2012-12-9-18-54.png

PastedGraphic9-2012-12-9-18-54.png

Just add one line of code.

PastedGraphic10-2012-12-9-18-54.png

The default id is “id1” or similar, you may change it into some meaningful name editing “plgin.xml”.

PastedGraphic11-2012-12-9-18-54.png

Setup “Run Configurations”

You can execute the application, but you need to setup using “Run Configurations…”.

PastedGraphic12-2012-12-9-18-54.png

In the Arguments, you need to add “-clean” for preventing “Workibench has not been created yet” error.

PastedGraphic13-2012-12-9-18-54.png

You need to click “Add Required Plug-ins” to make sure all the plugins are included in launching headless RCP.

PastedGraphic14-2012-12-9-18-54.png

You can change the workspace location for the headless RCP. As the headless RCP you are making is an eclipse, you can set where it finds the workspace for its own purposes.

PastedGraphic15-2012-12-9-18-54.png

You also need to check if you set the “Run an application” correctly set to your application.

1__%252524%252521%252540%252521__PastedGraphic-2012-12-18-18-54.png

Launch the RCP

You can click the run button and select the application you just created.

PastedGraphic17-2012-12-9-18-54.png

PastedGraphic16-2012-12-9-18-54.png

Reference